How to Install a US Standard Smart Switch in Your Home?
The integration of technology into our homes has rapidly transformed how we interact with our living spaces. According to a report by Statista, the smart home market in the U.S. is expected to reach over $150 billion by 2024. This growing trend indicates a significant shift toward automation and smart devices, including the US Standard Smart Switch. These switches allow homeowners to control lighting and appliances through their smartphones or voice commands, enhancing convenience and energy efficiency.
Installing a US Standard Smart Switch can seem daunting for some. However, simple DIY methods are available, making this technology accessible. Studies suggest that smart switches can reduce energy consumption by up to 15% when used effectively. Yet, many people hesitate to install them, fearing complexity or potential electrical hazards. It's essential to acknowledge that challenges exist, and proper guidance can mitigate risks.
Moreover, not all smart switches are created equal. Compatibility with existing systems and user interface differences can lead to confusion. The installation process may reveal unintended problems, such as outdated wiring. Recognizing these issues is part of the learning curve. Embracing this smart technology involves overcoming hurdles and understanding the long-term benefits it can offer.
Understanding US Standard Smart Switch Features and Functions
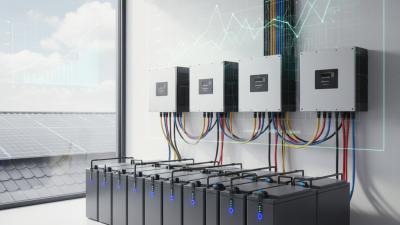
Smart switches are becoming popular in modern homes. They offer convenience and efficiency. These devices allow users to control their lighting from their smartphones or via voice commands. Imagine adjusting your lights as you arrive home. There's no need to fumble for switches.
Features of US standard smart switches include scheduling functions. You can set the lights to turn on and off at specific times. This is great for security when you're away. Many switches also offer dimming options, letting you customize the brightness. However, compatibility with home systems can be tricky. Not every device works seamlessly together.
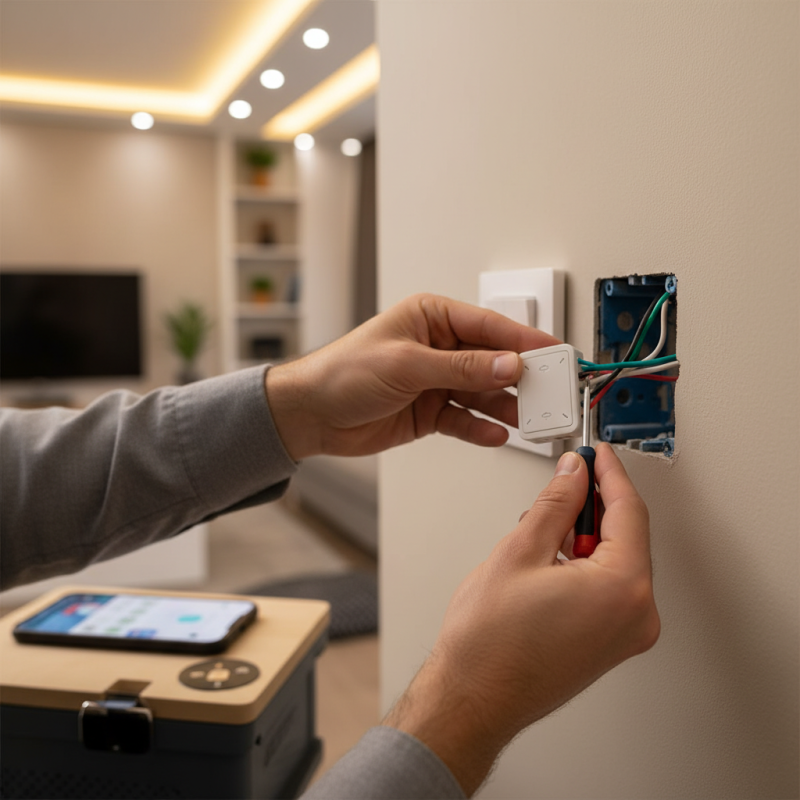
Installation is not always straightforward. You might face wiring issues that challenge even DIY enthusiasts. Understanding the wiring system is crucial. Following detailed instructions can reduce mistakes. Some people still overlook safety precautions, which can be concerning. It’s important to double-check connections to avoid electrical hazards.
Gathering Necessary Tools and Materials for Installation
When installing a US standard smart switch, gathering the necessary tools is crucial. A basic toolkit should include a
screwdriver, a wire stripper, and a voltage tester.
According to industry reports, nearly 47% of DIY enthusiasts start projects without adequate preparation. This oversight can lead to
delays and safety risks.
It’s essential to have a good understanding of the existing wiring in your home. Familiarize yourself with how switches are connected. You will often find two
wires, which are usually black and white, representing the hot and neutral. Ensure your home’s power is off before beginning any work to avoid electric shocks.
Tips:
Before installing, read the smart switch’s manual thoroughly. Each model may have specific requirements. Prepare for potential challenges, like discovering
outdated wiring or unexpected wall structures. Always double-check connections. An accurate installation means better functionality. If you feel uncertain during
the process, consulting a professional might save you from future frustrations.
Step-by-Step Guide to Powering Off Your Electrical Supply
Before you start installing a smart switch, it's crucial to power off your electrical supply. This ensures your safety and prevents electrical accidents. Research shows that nearly 30% of home electrical injuries occur during DIY projects. Taking the time to turn off the electricity can significantly reduce risks.
Locate your circuit breaker panel. Each breaker controls a different area of your home. Identify the correct breaker for the switch you are replacing. If you're unsure, use a circuit tester. This device can confirm whether the power is off before you proceed. Some professionals recommend labeling your breakers for future reference to avoid confusion.
Once you confirm the power is off, take a moment to examine your work area. Make sure it is clear of clutter. This will help prevent any accidents. If you have pets or children, it’s wise to keep them away during the installation. Remember, even with the power off, wires can be deceptive. Be vigilant about the connections and keep your tools organized to avoid mishaps.
How to Install a US Standard Smart Switch in Your Home? - Step-by-Step Guide to Powering Off Your Electrical Supply
| Step |
Action |
Details |
Tools Required |
| 1 |
Turn Off Circuit Breaker |
Locate the correct circuit breaker and turn it off to cut power to the area where you will work. |
Circuit Tester |
| 2 |
Remove Old Switch |
Unscrew and pull out the old switch from the wall box. |
Screwdriver |
| 3 |
Identify Wires |
Note the connection points and wire colors of the old switch. |
Wire Strippers |
| 4 |
Connect New Smart Switch |
Attach the wires to the new smart switch as per the manufacturer's instructions. |
Wire Connectors |
| 5 |
Mount Switch in Wall Box |
Carefully push the wires back into the wall box and secure the switch with screws. |
Screwdriver |
| 6 |
Turn On Power |
Turn the circuit breaker back on and test the new smart switch. |
Circuit Tester |
Wiring the Smart Switch: A Detailed Connection Process
Wiring a smart switch can be straightforward, but attention to detail is critical. Begin by turning off the power at the circuit breaker. This ensures safety. Use a voltage tester to confirm that no electricity is flowing.
Next, remove the existing switch cover and unscrew the old switch. Take a picture of the wiring. This visual guide will help during installation. Disconnect the wires, typically black (hot), white (neutral), and green or bare (ground). If unsure, refer to online resources.
Attach the wires to the smart switch according to its instructions. The black wire usually connects to the "Line" terminal. The white wire may connect to a neutral terminal. It may seem complex, but focus on each connection. A loose wire can cause malfunction. After connecting, carefully tuck the wires back into the box. Screw the switch plate in place. Finally, restore power and test the switch. If it doesn’t work, re-evaluate each connection.
It’s okay to make mistakes. Learning from them is part of the process.
Testing and Configuring Your Smart Switch After Installation
After installing a smart switch, testing and configuring it is essential. This step ensures that all functionalities work correctly. Industry reports indicate that nearly 35% of users face issues during the initial configuration. This often leads to frustration and unnecessary delays.
Begin by connecting the switch to your home Wi-Fi network. It might take several attempts to get the right signal. If the connection fails, check if your Wi-Fi router is within range. Smart switches often have a limited range. According to a survey by a leading technology firm, 40% of smart device issues stem from connectivity problems. After connecting, use the compatible app for testing.
During the testing phase, ensure that all features respond accurately. Turn lights on and off from your smartphone. Adjust brightness and color settings if applicable. Some users report difficulty syncing their smart switches with voice assistants. It’s crucial to verify which voice commands work. If something doesn’t work as planned, revisit the setup instructions. A simple oversight can lead to significant issues. Keeping a checklist may help in avoiding common configuration pitfalls.